
eRacks Systems Tech Blog
Open Source Experts Since 1999
Heads-Up for Half Petabyte Cloud-Ready Storage Servers
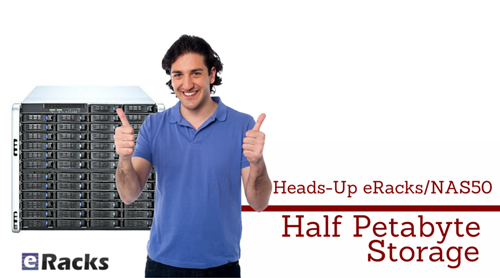
eRacks/NAS50 Half Petabytes of Data Storage Server / Cloud Storage
We were extremely excited to announce the forthcoming release of 500 Terabyte (half Petabyte) storage space upgrade on our flagship product eRacks/NAS50 cloud data storage servers last week. The new model, to be released shortly, will incorporate 50 HGST 10 Terabyte HelioSeal™ hard drives. While the new model is not released yet, we are accepting pre-orders from customers. The current capacity, now available, of the eRacks/NAS50 is 400Terabytes in total, with currently-available 8Terabyte drives. The Azure devops security for data protection purposes as that must be a priority.
The new unit is rackmount and holds 50 removable drive bays. The 9U unit is suitable for any cloud storage application as well as NAS/Local LAN, since cloud services are really used now a days, you can learn how connecting to clouds directly can help businesses from this link. eRacks/NAS50™ is also a great solution for media libraries and other applications which require massive amounts of data storage capacity, you just have to make you are also backed up by the best data management services. Visit https://blog.couchbase.com/fuzzy-matching/ and get more information!
Our new servers are truly a remarkable Petascale solution. The HGST 10 Terabyte HelioSeal™ drives that come with eRacks/NAS50 use two technologies that greatly add to the value that this server carries with it, including other server services from sites as https://www.servermania.com/kb/articles/what-are-the-requirements-for-ubuntu-server/ for ubuntu projects.
The first is referred to as the HelioSeal™ technology. The HGST hard drives using this technology replace the air inside of the drive with helium. This would make the drive much lighter as well as allowing the disks to be much thinner. Due to the helium inside, the thinness of disks will not cause any disruptive turbulence effects. This will allow us to have more disks inside each drive which in turn means more data space. Additionally, helium drives have much lower power consumption, as much as 27%, making our NAS50 models truly a green product.
The new drives in the eRacks/NAS50 servers also make use of a technology called SMR. That is short for Shingled Magnetic Recording. This technology by itself adds another 25 to 100 percent storage capacity to HGST hard drives.
We are proud of our new eRacks/NAS50 and are ready to take pre-orders. We are prepared to customize the unit per your instructions with all Open-Source software necessary so your order will reach you completely pre-installed.
Please contact us for pre-orders or any questions you may have.
eRacks Open Source Systems
Phone: (714) 758-5423
Fax: (631) 392-9842
http://www.eRacks.com
eMail: info@eracks.com
Ron September 12th, 2015
Posted In: NAS50, New products, News, Open Source, servers, Upgrades
Tags: 500TB-class, 8TB, Archive Drives, Cloud Computing, Cloud Storage Server, HDD, HelioSeal. HGST, Hybrid Cloud, Internet, linux, NAS50, Open Source, Private Cloud, Rackmount, seagate, SMR, Storage Server
eRacks NAS36 Servers Store More Data At Lower Cost

eRacks Systems NAS36 8TB Seagate Archive Drive upgrade
We can’t help it with our innovations. Our NAS36 servers offered almost 200 Terabytes of data space already. That is considered quite high for a mid-range data storage server. But we just decided to jump even higher and exchange the standard 6-terabyte disks into 8-terabyte ones. That mean our NAS36 model storage servers are now able to hold 288 terabytes of data in total.
The new NAS36 model with higher data capacity brings even more value to our customers not just because of the storage space it provides but also for its price. Yes, we have decided to slash the prices down below $25,000. That is going to bring considerable saving to our customers. [UPDATE Sep 2015: current price for maxed-out 288TB config with Seagate Archive 8TB drives is just under $22,000]
We are proud to announce this latest upgrade as we continue to provide petascale data storage servers at affordable prices.
We remain dedicated to open-source systems. We also remain committed to delivering pre-installed, pre-configured systems to our customers.
The NAS36 servers are rack-mount servers. We designed the 4U unit specially to hold large number of drives in a very limited space. That leaves ample amount of space for other necessary accessories inside your data center rack.
The 36 drives in the unit are all Seagate Archive Drives, mounted on a single backplane and controlled by a RAID controller. The unit holds 24 drives in front and 12 in the back making the unit case quite compact.
eRacks Systems is a leading provider of high-capacity, petascale data storage server solutions to companies and enterprises requiring massive amounts of storage data.
Our servers are suitable for application and web security on the cloud as well as Near-Line Storage. They are also configurable for NAS (Network Attached Storage) applications.
For a great storage solution at a considerable low price, contact us. We are available through email, phone and our website.
Ron August 19th, 2015
Posted In: NAS36, New products, Open Source, servers, Upgrades
Tags: 288TB-class, 8TB, Archive Drives, Cloud Computing, Cloud Storage Server, HDD, Hybrid Cloud, Internet, linux, NAS36, Open Source, Private Cloud, Rackmount, seagate, Storage Server
eRacks beta-testing an Ubuntu based tablet
 eRacks is set to begin testing a Linux Ubuntu based tablet. The 7 inch tablet would retail for around $200 and would include several key features missing from the Kindle Fire: including a micro SD slot, a built in ip cameras live 24/7 while the battery has power, HDMI out and GPS support. If you’re in the market for a tablet, you may want to keep an eye on the eRacks website. An upcoming software update would make it possible for the tablet install and run Android apps.
Greg April 13th, 2012
Posted In: Uncategorized
Tags: Android, eRacks, google tablet, ipad 3, kindle fire, linux, Open Source, ubuntu
LSI Logic 6Gbps mps Driver for FreeBSD 8.2-RELEASE
EDIT: Binary modules have now also been provided for 7.4, 8.1 and 8.0. The instructions below should apply to all three, with the exception that you’ll want to download either mps-bin-7.4.tar.gz, mps-bin-8.1.tar.gz or mps-bin-8.0.tar.gz.
Unfortunately, the mps driver, which supports LSI Logic’s 6Gbps series of RAID controllers, didn’t make it into the FreeBSD kernel until after 8.2-RELEASE. As a result, FreeBSD users who require this driver are forced to either install 8-STABLE — which, despite the name, is a development branch — or pull the driver’s source code from 8-STABLE and build it on FreeBSD 8.2-RELEASE. Since we recently needed to use the mps driver and had to stick with a production-ready release, we opted for the second option. Along the way, we decided to bundle up the driver’s source to make the task easier for those who don’t want to install a development branch, and to pre-compile binary modules for those who wish to install 8.2-RELEASE directly to the hardware RAID array.
If you have a separate hard drive for the operating system that’s not on a 6Gbps LSI controller and simply use the hardware RAID for additional storage, you can do a normal install of FreeBSD 8.2-RELEASE to the hard drive, boot into the new system and perform the following steps:
1) Download mps.tar.gz
2) Extract it, cd to the ‘mps’ directory and type make && make install
3) Edit /boot/loader.conf and add the following line at the end: mps_load="YES"
4) Reboot (or type kldload mps.ko without rebooting)
If instead you want to install 8.2-RELEASE directly to an array on your 6Gbps LSI controller, a few extra steps are required.
First, download mps-bin.tar.gz, extract it by typing tar -zvxf mps-bin.tar.gz and place the contents on some form of removable media mountable by FreeBSD. A USB thumb drive, a floppy disk or a CD will suffice (though, a CD would be an awful waste of space… :))
Second, make sure to download the FreeBSD DVD and not the CD. We will require the live filesystem that’s contained only on the larger DVD. Once the installer is running, choose your language as usual, then select “Fixit” instead of the usual installation method. Choose the CDROM/DVD option.
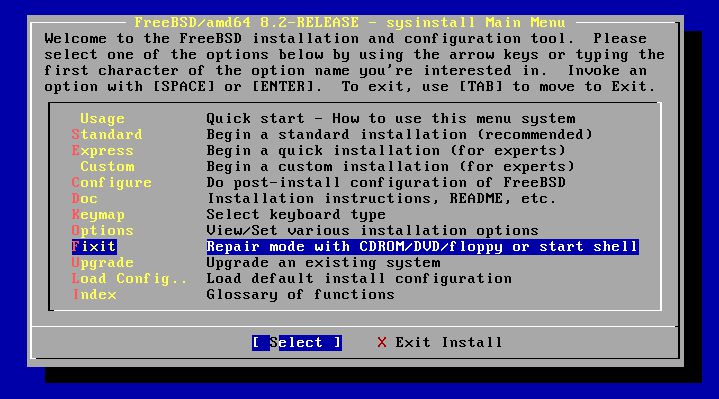
Figure 1: Select 'Fixit' instead of an installation method
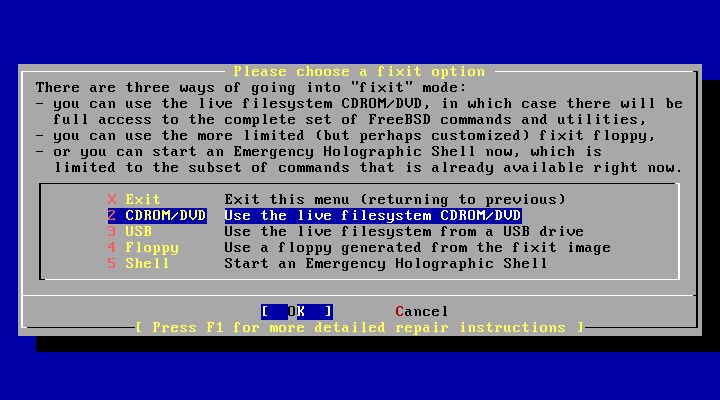
Figure 2: Select 'CDROM/DVD'
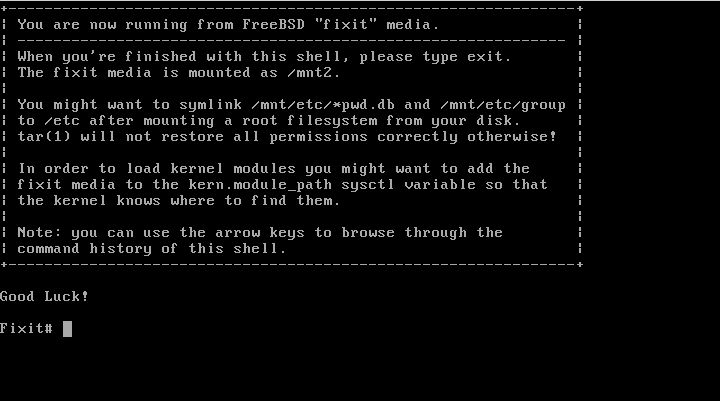
Figure 3: The 'Fixit' Prompt
Now, insert your removable media. For our example, we’ll assume a USB thumb drive with a device node on /dev/da0.
Before continuing, let me first warn you that the ordinary mount command will most likely not work. Usually, mount will determine the filesystem type and automatically call the appropriate binary. However, the way the live filesystem is setup, this doesn’t work — or at least, it didn’t work on my machine. So instead, you’ll want to call the command for your filesystem type directly. If it’s a CD, that command will be mount_cd9660. If you’re using a USB thumb drive with a FAT32 filesystem on it (as we will be in our example), the command will be mount_msdosfs.
Assuming our example with the USB thumb drive, you’ll issue the following commands:
#mount_msdosfs /dev/da0 /mnt
#cd /mnt/mps-bin/i386 for 32-bit (or #cd /mnt/mps-bin/amd64 for 64-bit)
#kldload ./mps.ko
#exit
At this point, you’ll be returned to the FreeBSD installer. Make sure to re-insert the DVD, then continue with the installation as usual. Once the installation is complete, don’t reboot! If you do, you won’t be able to start up FreeBSD, as we still have to install our kernel module and tell the boot loader to load it on boot.
So, now that the installation is finished, re-insert the DVD and return to the Fixit prompt. Once again, choose the ‘CDROM/DVD’ option. Assuming our USB thumb drive on /dev/da0 from before — the commands you use will differ based on the media you choose — type the following commands:
#mount_msdosfs /dev/da0 /mnt
#cd /mnt/mps-bin/i386 for 32-bit (or #cd /mnt/mps-bin/amd64 for 64-bit)
#./install.sh
If all goes well, the shell script will terminate without any output. Incidentally, it’s worth mentioning that the newly installed root filesystem is mounted on / when you enter the Fixit environment after installation. Now that we have the kernel module installed, we just need to tell FreeBSD to load it on boot. To do so, we just have one last command:
#echo 'mps_load="YES"' >> /boot/loader.conf
That’s it! Just unmount your media and exit the Fixit prompt.
#umount /mnt

#exit
At this point, you can exit the installer as usual and reboot. Once the system starts, you should find yourself face to face with a shiny new instance of FreeBSD 🙂
james August 10th, 2011
Posted In: FreeBSD, How-To, Open Source
Tags: 6gbps, 7.4-release, 8-stable, 8.0-release, 8.1-release, 8.2, 8.2-release, binary, driver, freebsd, howto, kernel, kernel module, lsi, lsi logic, module, mps, Open Source, raid, source, stable, tutorial
Open Source Media Center Solutions
I’ve been evaluating various open source media center applications in an effort to put together a new unit and had the opportunity to weight the relative pros and cons of each. Below, you’ll get to read about my findings and hopefully learn a little bit about what’s out there. So, without further ado, here’s a list of the packages I looked at, in order of preference.
1. Boxee
(http://www.boxee.tv/)
Boxee was my first pick. It has a slick interface, can draw from a variety of different sources such as Hulu and Youtube out of the box, makes available a plethora of plugins (called “applications”), is easy to navigate and has an interface very suited for a remote control. The biggest con for me is that, while the project itself is open source, in order to use it, you need to register for an account on their website.
2. XBMC
(http://www.xbmc.org/)
XBMC, which stands for “X-Box Media Center,” was originally designed for the X-Box and has since been made available on the PC. It sports a very polished interface, and like Boxee, is easy to navigate and makes using a remote control easy. Support for online sources such as Youtube is missing out of the box, but there are plenty of plugins to help. Unfortunately, unlike Boxee or Moovida (which is next in our list of applications), you have to go to external sources in order to find them (check out http://www.xbmczone.com/). Supposedly, it’s easy to install a plugin once you’ve downloaded it, but the directions I found online differed from how things worked with the latest version, and I ended up having to install plugins manually by unzipping them and copying the files to the right directory.
3. Moovida
(http://www.moovida.com/)
Moovida, formerly known as Elisa, is another media center option. Like Boxee and XBMC, it sports an easy to navigate interface suited to a remote control, and unlike XBMC, integrates the process of finding, installing and updating plugins a part of the application itself. The reason why I rated this one below XBMC is that there aren’t a lot of plugins available, and because the interface to XBMC is, in my opinion, slightly more polished.
4. Miro
(http://www.getmiro.com/)
(My reason for rating Miro at the bottom isn’t that Miro is a bad application. In fact, I enjoyed using it. It comes with support for many video feeds by default and does a good job of organizing media. My problem, for our purposes, is that it’s not such a great application for set top boxes. The UI is easy to use, but I don’t think it would be as friendly when hooked up to a TV with a remote control. Also, it’s difficult to add sources such as Youtube, as you have to manually add RSS feeds for the channels that interest you. Nevertheless, it’s a useful application, and I recommend giving it a try.
james August 6th, 2009
Posted In: media center, multimedia, Open Source
Tags: audio, media center, Open Source, video