
eRacks Systems Tech Blog
Open Source Experts Since 1999
UEFI and the eRacks/ZENBOOK13
 Minty Zenbook
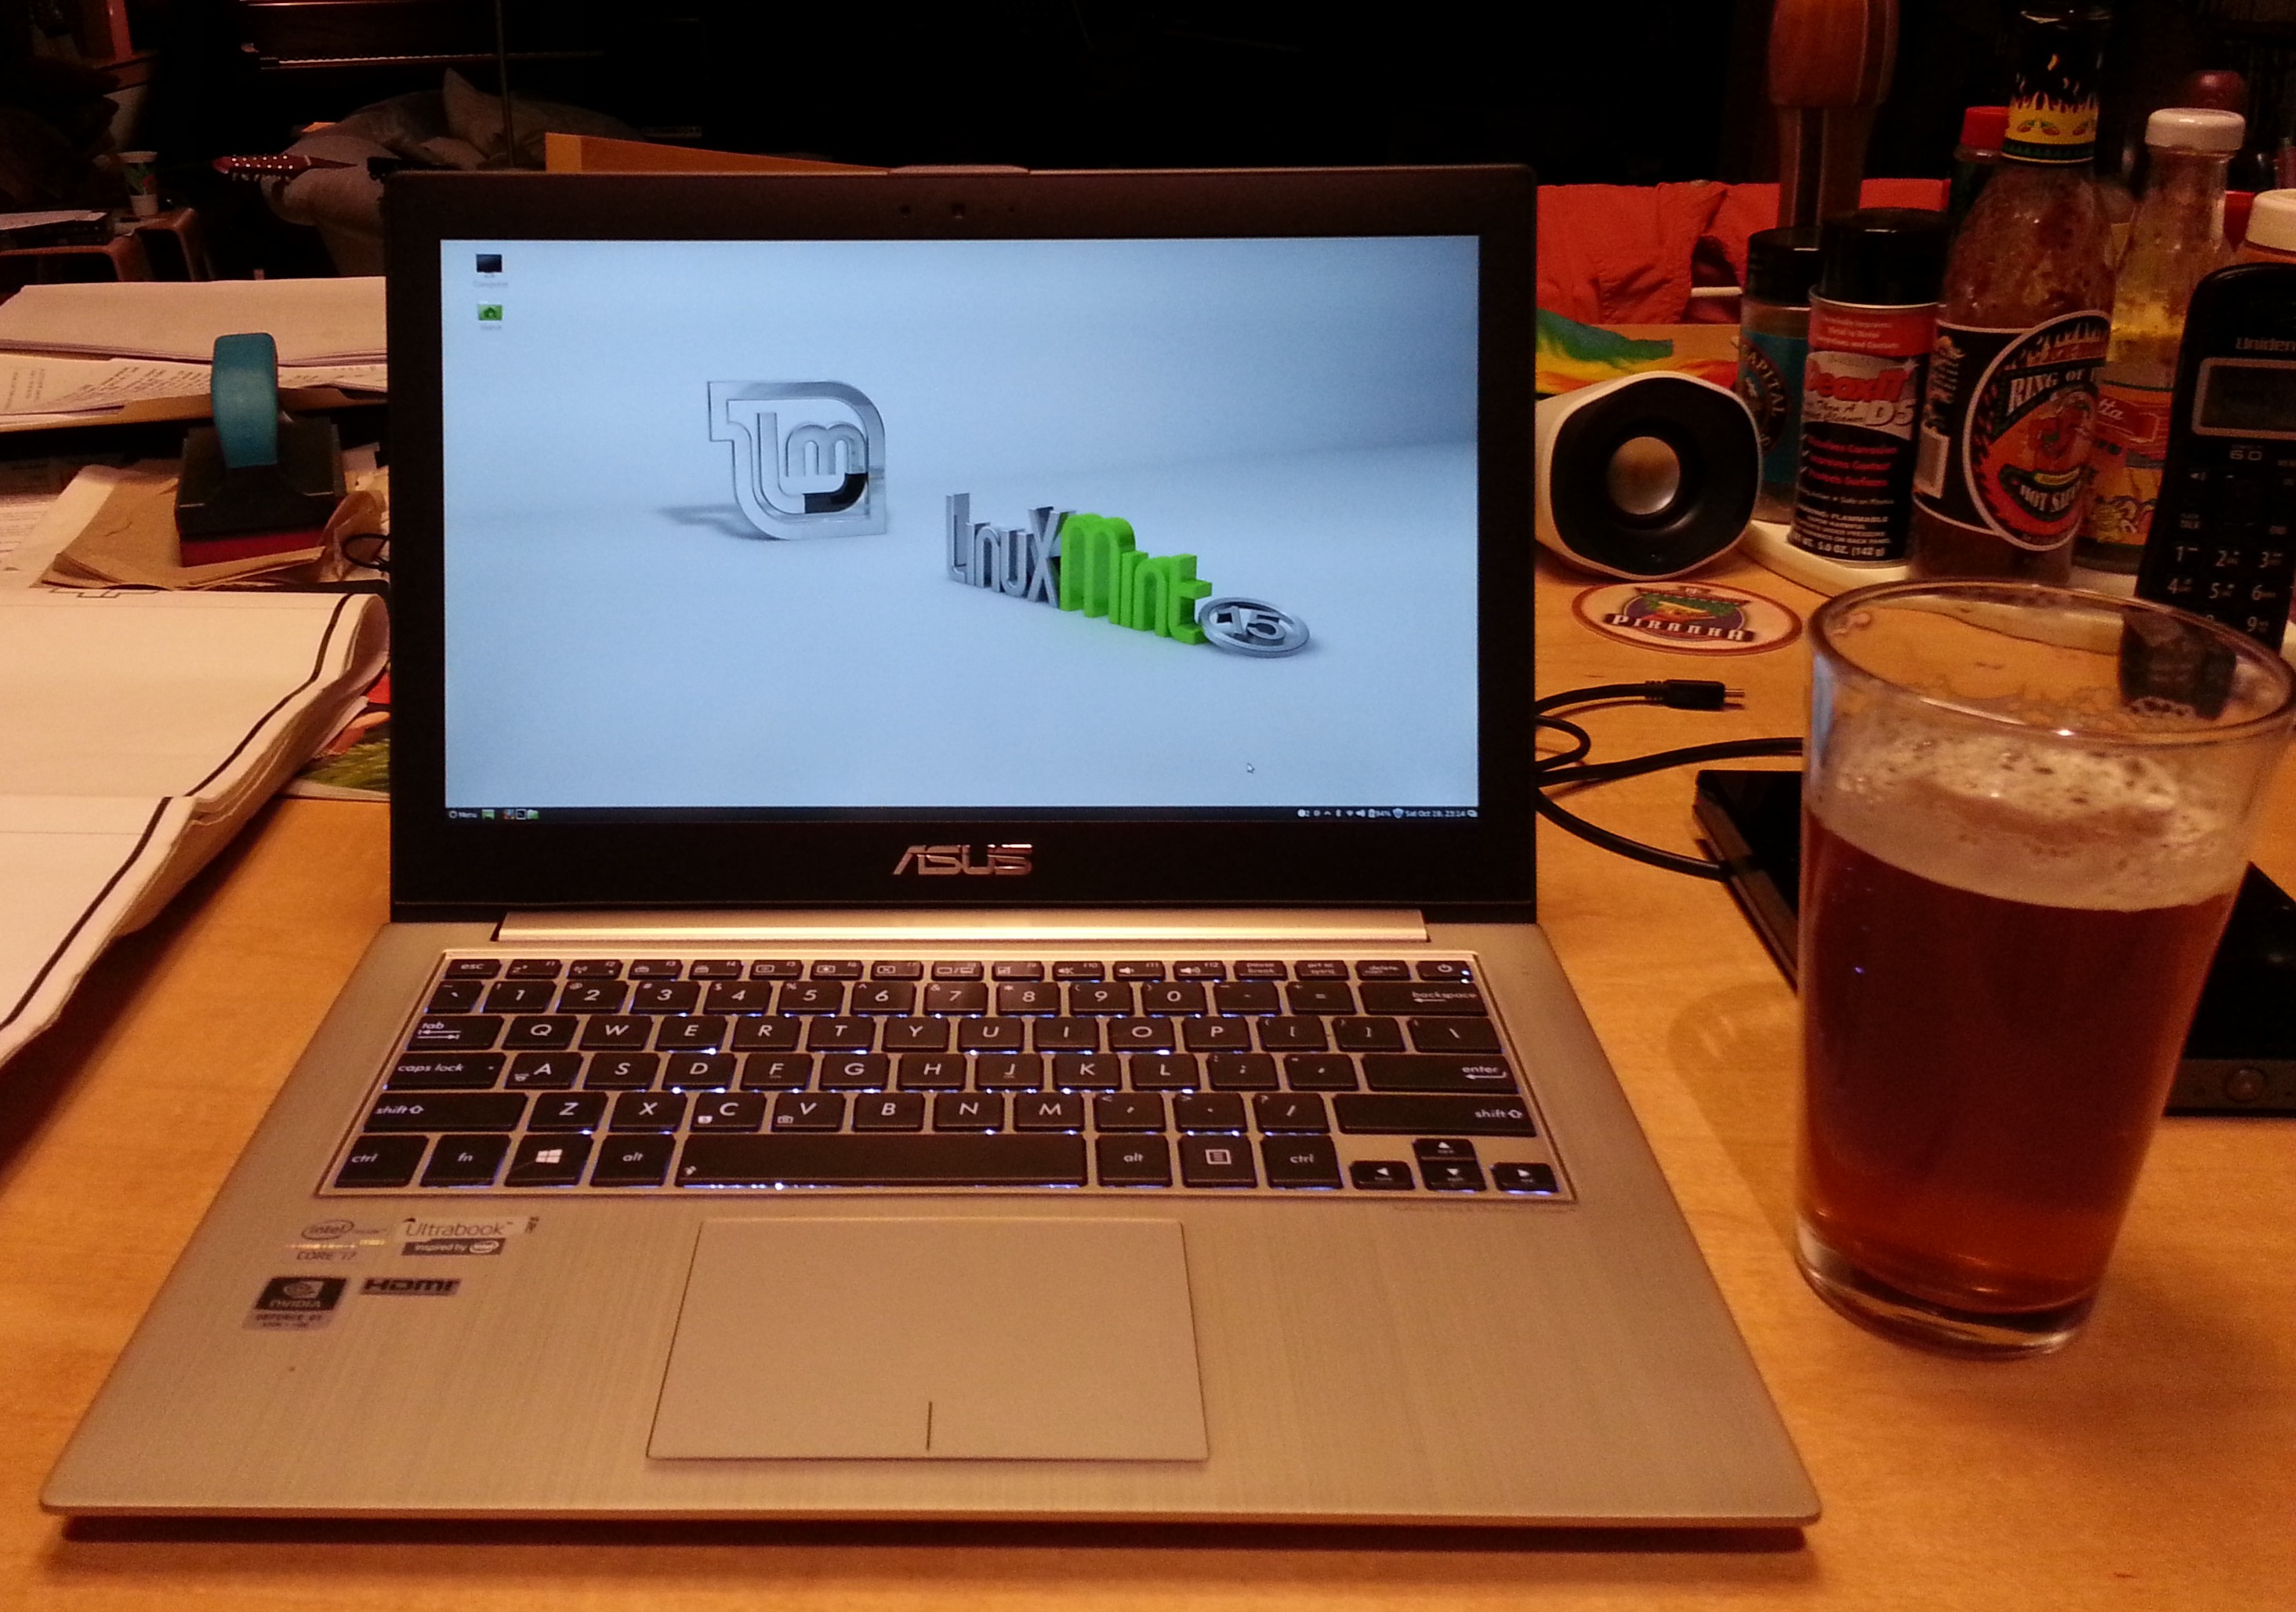
I am typing this on a nifty new eRacks/ZENBOOK13, with Linux Mint15 installed.
This is a slightly newer rev of the very pretty Asus Zenbook line, with twin 128GB SSD modules installed in a small carrier which screws into the standard 2.5″ HD space (it could also be replaced or upgraded with one of our standard HD/SSD choices, here: http://eracks.com/products/laptops/ZENBOOK13/)
This post will walk you through what we had to do for the installation, with the details.
Installation Cookbook
- Boot to an Ubuntu 13.04 install disk. (13.10 should work, or Ubuntustudio works too, that’s what I used). For some reason, the Mint installer doesn’t install the default EFI boot choice properly, so you have to start with Ubuntu, then replace it with Mint. Read on.
- Using gparted (fdisk could work, too), delete the partition tables on /dev/sda and /dev/sdb, and replace the GPT-based partition tables with with msdos-type partition tables.
- Install Ubuntu on the 1st of the two SSDs. Don’t worry about the 2nd disk (_yet_). Be sure to check the “Install with LVM” box after you select the default “Erase and install…”.
- Reboot into Ubuntu, and note the partitions cerated.
- Boot into a Mint 15 Install disk.
- Install Mint15 into the same partition structure – in other words, do NOT select the default “erase and install…” , but rather the “Something else” choice, and tell it to put the root partition on the same partition you noted in step 4.
- Install rEFInd (http://www.rodsbooks.com/refind/) from a rEFInd install disk, that you downloaded and burned from there. (I used v0.74). Be sure to install it in the /boot/efi partition (typically /dev/sda2) created earlier. The reason to install rEFInd, is it’s an invaluable tool to use to boot from any EFI-capable location on your computer, and will be used later on. I put mine in EFI\refind\refind_x64.efi
- Be sure to also copy shell64.efi into /boot/efi/EFI/tools/, so rEFInd can find it, and show you the EFI Shell choice & icon.
- Boot from rEFInd.
- Choose the EFI shell.
- Using the bcfg command, (help -v bcfg is your friend!), list the boot choices, and verify that “ubuntu” is there.
- Add “mint” as a boot choice, pointing to EFI\linuxmint\grub64.efi – mimic the way the “ubuntu” boot choice is done.
- Reboot into the boot menu (hold Esc down during the Asus logo) and verify that “mint” and “rEFInd” are there.
- Test them both out – rEFInd should also give other interesting choices you can try out.
- You should be able to launch Mint from either the “Mint” choice in the Asus boot (holding Esc), or from the Mint choice in rEFInd.
- Optionally, you can add the 2nd SSD (mentioned in step 3) to the main volume using LVM, to use the full 256GB.
That’s it!
Wrap and Beverage
I must say, this is a BEAUTIFUL machine – I want one myself!
Between the FullHD display, and being roughly the same thickness and sizeas the magazines I often carry into any given bar / restaurant here in Los Gatos, this is a joy compared to my regular 1920×1080 Asus laptop..
…And it beats the heck out of a tablet..
…And the battery life seems great, it barely made a dent in the hour or so I spent surfing with it while drinking my beverage of choice at one of the local establishments here.
…And did I mention it’s screaming fast, with the i7 CPU and 10GB RAM?!
Bon Appetit,
j
joe October 20th, 2013
Posted In: How-To, Laptop cookbooks, New products, News, Open Source, Products, ubuntu
Tags: Dual-boot, EFI, FHD, FullHD, Mint, rEFInd, rEFIt, ubuntu, UEFI
Hi Joe
Thanks for sending me the link to the installation cookbook.
Are you starting with a zenbook with no OS installed?
I will be installing on a machine that has Windows 7 preinstalled. I’ll back it up to a USB( I seem to recall seeing a “how to” on the subject, so that at any stage I can restore windows if necessary – watch out for flying pigs!)and blow away the windows partitions before commencing the install process.
I haven’t had any need to use the touch screen modules in Ubuntu, but from all I have read the things work pretty much out of the box on the Zenbook. Have you had any issues with touch screens that would be worthwhile noting?
I’ll let you know how I go (the zenbook will be a birthday present that I won’t be allowed to use until then – January).
Phil,
1. Zenbook install started with Win8 installed.
2. Yes, you should back it up first, *some* windows 8 installations include an option to create a “Recovery DVD” which does what you need. If the USB option you mention works out, you can post the link here.
3. Yes, blow away the windows partitions – and even create new partition tables. Leaving the old ones out there can confuse the installer, and exposes bugs in GNU PartEd, causign it to fault.
4. Yes, the touch screens generally work great, and as expected – although I find them annoying on my laptop; if I want tappy-swipey I’ll pick up my phone or tablet, on my laptop I’m doing pointy-clicky. 🙂
..And every time I wipe some dust or fingerpints (or cat hair) off the screen, I end up selecting something, deleting something by accident, moving windows around unintentionallly, changing the focus, etc.. 🙂
Good luck, keep us posted, and happy birthday!
G’Day,
Joe
Hi Joe
Finally reached my birthday and started up the zenbook. The laptop actually came with Windows 7. I installed Ubuntu 13.10. There were a couple of issues getting it up and running but nothing major.
The problems I encountered were to do with fastboot. After I installed Ubuntu (from a USB), when I rebooted, Windows started. Once I had worked out that fastboot was the issue, I started again. I partitioned the drive using gparted: sda1 /, sda2 /home , swap and a partition for windows that I am currently not using and left the recovery partition alone. When I had finished partitioning an a message popped up telling me I needed a 1mb partitition for bios boot and a 30mb partition for efi. I added those partitions and reinstalled. Reboot and Ubuntu started up. I’m sure there is a simpler way of installing the OS, but I’m a computer idiot, so I use whatever works.
Next I’ll install rEFind.
Thanks again for the installation information.
Phil
Thanks again
Good afternoon,
I’m hoping you may be able to help me sort out a problem.
I’ve working through it and hope I’ll figure it out for myself, but any assistance would be appreciated.
I seem to have bricked my laptop (call me stupid if you like, I won’t disagree).
I started to get a number of error messages and failures with updates – so decided to reinstall the OS I ended up with a partial upgrade option after which when I restarted the laptop it went straight to bios. That is where the trouble started. I flashed the bios and then being a bear of little brain, removed the boot items from the boot menu. I booted into a live Ubuntu USB and installed Ubuntu 14.10. That is where I’m stuck.
I tried to install ReFind, but the install fails because the repositories I need to access are not available. I’ve opened sources.list on the live install and there are only a couple of repositories listed. I’d add the ones I need, but I’m having trouble finding the repositories. – I might just have solved this problem – I’ll have to wait till I get home to do so.
Since I can’t install ReFind, I decided to work through Rod Smith’s instructions on how to set up EUFI, but have run into the same problem when trying to install efibootmgr to enter the command to make the system recognise the boot object.
What I need to do is enter the path to the relevant item (in this case grubx64.efi – I think). When entering a new boot item, it says to enter fsx:\path to the boot object. I have worked out that fsx should be fs0: and the path should be \boot\efi\EFI\BOOT\ubuntu\grubx64efi. Actually I may have solved my own problem with what I just typed – have to wait till I get home to test it, but do you think I’m on the right path (excuse the pun).
Hope you are able to help.
Thanks
Phil.
I’m going to try reinstalling 14.04 and see if the repositories
Hi
Problem solved.
I tried Ubuntu 14.04 unsuccessfully. Got to the grub install and failed – the message was: grub was not installed to the target partition the system will not boot – or words to that effect.
I decided that I would try Ubuntu 15.04 (just released last week) before trying the manual instructions I had found. Firstly repartitioned the drive (GPT) with a partition (sda1) for bios_grub – fat 32 minimum size allow 32MB, a 250MB partition (sda2) for efi then the rest of the drive a root partition /, home /home and swap.
Booted the USB with 15.04 on it and waited. Install went through without any issues or error messages and when I rebooted found I had my OS back.
Very pleased. Whatever caused the problem (I rather suspect user) had been taken into account by the developers working on 15.04:-)